
Our Inos Caravan
Built December 2021-February 2022.


Please note that the
above Inos features a number
of post purchase modifications carried out by the owner.
~ Introduction,
~ Build (click here to
view),
~ Personal In-Depth Review (click here to
view),
~ Modifications
and Additions (click here to
view).
Please note that what follows is all our personal viewpoint and you are welcome to disagree with any/all of it.
Introduction.
We loved our 2019 Swift Elegance 560 and initially planned to keep it for a long time (hence the numerous additions and modifications you can find here: Elegance 560 ). However, with retirement comes the opportunity to spend more time away and the prospect of more time away meant we turned our attention to even more comfort and space.
Initially
we looked at the twin axle eight foot wide Elegance Grande models (along
with the competition in the rapidly growing £40k-50k market
in Summer 2021).
Sadly we struggled to find inspiration and weren't really that impressed
regarding any gains given the outlay required above what we already had.
The main issues across the brands were build quality (which we had assumed
would
be a universal
problem of trying to squeeze ever more stuff into a package with a fixed
weight ceiling) and (very much related) payload.
After
adding
the goodies we now wanted (E&P levelling, Quad motor movers, A/C,
Roof mounted electric awning) the payload margin was just too tight
for us to avoid
moving
far too much
gear back and forth
between the caravan and tow vehicle each time we move. What we really
want is to be able to store everything in transit where it would
be used
on
site.
It
was then we stumbled across the Inos caravan. There was very little
online and no proper reviews that weren't a decade old (one reason
I then did my own review).
The only option was a factory visit which we booked.
As we had a pick
up we had immediately noticed the other options in the Fifth Wheel
Company "stable", most notably the Celtic Rambler.
The more we poured over what information we could find the more we
shifted our minds towards the Celtic Rambler. Without having actually
seen one other than online we got the
impression that it had even more space, more storage and had the added
appeal of being so different to everything else. The obvious stability
when towing didn't really feature for us as I have
never had an issue when towing a decent sized twin axle caravan when
properly loaded and when not trying to overtake everything in sight.
So when we arrived at the factory for a two day visit (staying in the
hotel overnight) we had totally switched our plans and planned to buy
a Celtic Rambler.
By the end of day one, having looked at every inch of both, our minds
were set - on the Inos!
I'm not going to go into full details about our choice here as everyone's
perspective is different. We went to buy a Celtic Rambler, but fell
in love with the Inos..
Yes, it
would
still be
crazy
money,
but we were both
hooked and decided that if value as well as outright cost is considered
then perhaps not quite so crazy....
Here
is the link to a "comparison chart" I drew up before making the final
decision (Inos vs CR). Please note that these are all personal perspectives
(which for us are what matter).
Inos/Celtic Rambler Comparison
What
were the key features that won us over compared to other "normal" caravans?
Solid build quality.
Modern woodless (almost) construction with thicker, stronger panels than
other caravans.
Tows as a standard width "narrow" caravan
and grows 18 inches wider than even an 8 foot caravan on site.
Choice of wood/door/worktop/fabric
finishes and other custom features.
The design team are very accommodating.
A huge payload which allows us to have it set up and equipped
exactly how we want.
Were
there any negatives?
No AlKo wheel lock mounts (they are a pain I
know, but can give 15% insurance discount!).
Awning
rails look like an afterthought with rough ends (we opted to do without
- will buy a Thule
Panorama "room").
The
choice of finishes is less than it used to be.
Some things that get included by mainstream manufacturers (and Vanmaster)
on their top models are all extras or just not available.
The front is not a flattering view (granted, a very personal judgement
and I already have plans for changes - see
here).
(Also see the review section later).
Other
points to note:
The cost of an Inos means that unless you are extremely
wealthy it's not one of those caravans that you'll trade in every few
years for a newer model.
Now this isn't really an issue for two main
reasons:
The build of the Inos means that many older examples are still going
strong with no issues.
Unlike mainstream manufacturers who are in a race
to visibly update their units every season, a new Inos and an older Inos
appear pretty similar with very slow model evolution. Buying the latest
version no longer feels as "necessary".
I knew from the outset that I would be making a number of additions and modifications and given the semi-bespoke nature of the build I was able to work with the design team to put some of these in place during production or, which was common, build the caravan in a way to more easily allow me to make my additions post delivery. For example, one major aspect of a slideout caravan is that wiring going into the slideout has to go on a long journey through an articulating cage guide. A real pain to retrofit extra cabling, so apart from anything else I have specified an extra 12V power cable loop to tap into and an 8 core signal cable to use for future projects.
The Build. The build photos below have kindly been provided by the Fifth Wheel Company Ltd.

Note
the AlKo Premium jockey wheel with weight gauge.
The caravan being built in
the background is the new demonstrator (we did check that it would have
no new features not present on ours).

Note what appears to be a very long A-frame.

This
2800kg chassis has more cross members and bracing than the 2000kg version.
The
onboard grey water tank will sit by the writing on the chassis (I will
explain the grey water tank "rationale" elsewhere).
Note
the slideout section in the background.

The
E&P axle cylinders are in place along with the AlKo ATC module.
The fresh water tank can be seen.

Note the extra outriggers on this heavyweight chassis.

The
construction of the composite panels can clearly be seen.
Compared to
our all-composite Swift Elegance these panels are much thicker and so
much stronger.

Again,
note how long the protruding A-frame is.
Also of note is that the front
locker is within the caravan main structure - again, very different to
our Swift and many mainstream builds where the locker is mainly enclosed
withing the protruding front moulding.

I have discovered there is a ply skin on the top surface of the floor to aid flooring adhesion. The ply sits on top of a secondary aluminium skin. What this means is that even if the ply gets wet the aluminium should hold it all in place and the strength will not be compromised. So not completely woodless, but not a risk of structural issues in case of water ingress either.

The
huge dimensions of the slideout are easily seen.
The wheel arches are stainless
steel and insulated as standard.

I
can tell you now that the wiring in our Swift was nowhere near as
neat!
The high level brake light is not standard, nor is the rear view camera
that I have supplied for them to fit for me as the build progresses,
an example of the bespoke nature of the Inos build.

That top rear lip may be good aerodynamically but may cause issues with our cover (Specialised and Protec do make one for the Inos). I will need to make some form of a padded protector.

We specified the spare wheel in the left of the front locker. It all helps to keep both the nose weight up and with the gas bottles also pushed to the same side helps counter the slight L/R imbalance caused by the slideout (all based on weights measured on all 4 wheels and nosewheel of demonstrator).

Our
first view of the interior wood finish we have chosen and
a good view
of the flooring vinyl (we will carpet some areas).
One slight disappointment
is that unlike in earlier models there are only now two regular choices
of
wood
colour, flooring and similar for worktop, etc. The wood choices were a typical
pale Oak
or the richer colour above. The bespoke nature of the Inos is slightly less bespoke
than it used to be. In our case the delivered Inos interior will not be the
finished
Inos interior as my "modify everything obsession" will be exercised
rather than
exorcised!

You
can just see in the centre foreground a circular cut in the flooring.
This will be the service/cleaning hatch for the grey water tank.
The extended door entrance mat I will fit will hide this nicely.
The radiator
section looks high, but there is also underfloor heating.

The Alde 3020 and the specified Alde Flow. The Inos has a domestic sized shower cubicle so near continous hot water seems appropriate.

The
exterior now looks more finished with the GRP sections all in place and
the mastic tidied up.
The body
sides come down lower than most caravans (see how the motor movers are
almost hidden). This also explains the more pronounced upsweep to the
rear.
The white catches will be changed to black later in the build.

On its wheels now.......

Obviously sitting a bit high as still an empty shell.

So how much extra space does the slideout give us? Quite a lot!

The
furniture is taking shape (will go in through the slideout aperture).
It's not dovetail "olde worlde" craftmanship, but it's accurately cut
on computer controlled machines, well finished and clearly very strong
with panels double the thickness of
that in many
caravans.

Looks like the washroom base cabinets.

Part
of the kitchen. The thicker ply is very clearly seen here.
The soft close drawer fixings are domestic, so heavier duty (and
heavier) than caravan versions.
 .
.
The kitchen cupboards and drawers will contrast with the rest of the interior. Why white? It turns out that for new Inos builds the options are white or one of the two wood colours now available in the reduced option palette. Luckily we are happy with white...

The
roof hatches are in (the middle opening is for the air conditioning unit).
I did consider an electric opener in the bedroom but I will modify
the existing unit with a robust and reliable electric opener if required.
I didn't specify an omnivent in the kitchen as there is a built in cooker hood
(which
I
might
"supercharge" if I feel it's necessary).

I'm
beginning to suspect that one reason the Inos is so heavy is simply the
amount of cabling involved!
I am partly to blame because our Inos will
have extra cable (both power and multicore signal) ready for my own
additions.

All
the Alde stuff in the foreground will be under the bed and only accessible
with the slideout extended.
The rear roof opening will be for the omnivent
in the bathroom.
The caravan wall thickness is clearly seen in this photo (much thicker than "normal caravans" - though it needs to be given the size of the slideout aperture!).

I included this rather blurred photo (hope to get a better version down the line) because it shows the heating pipes in the slideout. I am impressed that they manage to put heating pipes here and am very curious to see how they manage the pipe connections and pipe articulation as the slideout moves!
I'm no expert, but it is very clear that an Inos build is much slower than would happen in a Swift/Bailey/Coachman/Elddis factory. Only about twelve Inos caravans are built each year.

You
can see the soft close locker door hinges in the "overhead" assembly.
There's certainly going to be plenty of radiators! You can also see the
slideout frame has been fitted.

Another
good view of the Alde 3020 and Alde Flow.
The hole in the floor is access to the fresh water tank.
The grey fittings in the foreground
hints tells us that the grey water system is going to be as over-engineered
as everything else appears to be!

The
heating pipes are a mix of usual caravan stuff and 15mm barrier pipe
as used modern homes.
The rollers for the slideout are clearly visible.

The
slotted metal grill at floor level has radiator behind it.
Good to see
the shower wall is going to be very substantial. Apparently the shower
is 800mmX800mm.

I've
been impressed from the start at how neat everything is in the factory.
The blue box inside the open locker is an electric diverter valve for
part of my custom water system.

Yet more radiator behind that grill. The motormover controller boxes are in and blimey - that's a lot of wire!

The
kitchen bases are in and the hole on the right is for the extra raise-up
worktop extender.
Heavy duty soft close drawer runners are evident. The corner sections
are solid Ash I am told.

And
also the kitchen overhead lockers. The extractor is visible. The microwave
will be on the right.
The hole in the roof is for the A/C - it's easy to forget how much thicker than
usual these body panels are.

And the beginnings of a control panel area. I will be making changes here which will be simpler post build.

On
the left the flap for "boot" storage. The right hand section
pulls forward to make a second double bed.
Also visible is the round access
hatch for the grey water tank. The hatch will be hidden by the extended
entrance mat I will install.

And there is the magazine rack on the right.

The bifold glass shower door is in and you can see the heating flue on the left.

I am particularly pleased how they managed to accommodate my twin water inlets so I can install my "signature" automatic changeover Aquaroll system (there is also an onboard tank available).

Major
step. The all important slideout is finally in.
The auto changeover gas
valve is in.
The flap just in front of the lower fridge vent is for external
Sat or Aerial
hookup.

They
have lined up the water inlets nicely with the EHU inlet.
I can see they
have also fitted my rear view camera (just under the 3rd brake light).

The front section of the slideout. There will be a two seater sofa on the left and on the right, the media centre with 32" TV diagonally above.

The
front is also more complete with more trim panels in place around the
windows.
I can see that they've also fitted the camera WiFi transmitter
I supplied nice and high and at the very front as requested (take note
Swift!).

The
kitchen is shaping up nicely. The grey splashback is darker and less
blue in real life.
The hob has two gas burners and an induction ring.

And
the view to the rear. You can just see into the washroom.
We have chosen
a compressor fridge (the bottom section is the freezer).
Should more
battery capacity be needed the battery box apparently has room for two
batteries.
There will be a solid sliding door between the kitchen and bedroom (with
a cutout at the top to allow the A/C outlet to blow through).
The A/C unit is just visible.

The
dressing table and wardrobe are in along with the aerial and amplifier.
There will be a large sliding wardrobe door.
The open section above the
dressing table is where I will mount a small bedroom TV.

And this is the rear end of the slideout. Those bedside shelves hinge up to reveal extra storage.

For
us this an exciting picture as it shows our caravan about to go out on
its first road test. This is an important milestone.
There is still the
roof awning to fit and the decals before valeting and PDI can begin,
but getting closer.
The door is actually second hand as I prefer it to the current production
version - the team came up trumps here when it comes to customer service!

Really
coming together now.
The first glance of our chosen upholstery (sometime later to be replaced
when I decided to do my own upgrades).The "mood" lighting is
thankfully a remote control RGB system, so pale lilac is not cumpulsory!
 .
.
The
central drop down sections will have foam inserts cut to take our chosen
tipple and glasses.
I will be adding custom curtains and wall pads in
due course.

This is the front of the slideout.

And
a wider angle view of the "lounge area".
There is a seat back rest still
to go in.
As mentioned earlier the round hole is the access for cleaning the grey water tank.

The kitchen is pretty much done.

Just the mattress to add here. It has a fold in it - not for day/night (the caravan is wide enough not to need this) but for "slide-in".

The sliding wardrobe door is matching wood, just covered up at this stage.

And last but not least, we have a toilet!
Personal Review
The caravan as collected from the factory and our initial observations and comments on the "standard" Inos.
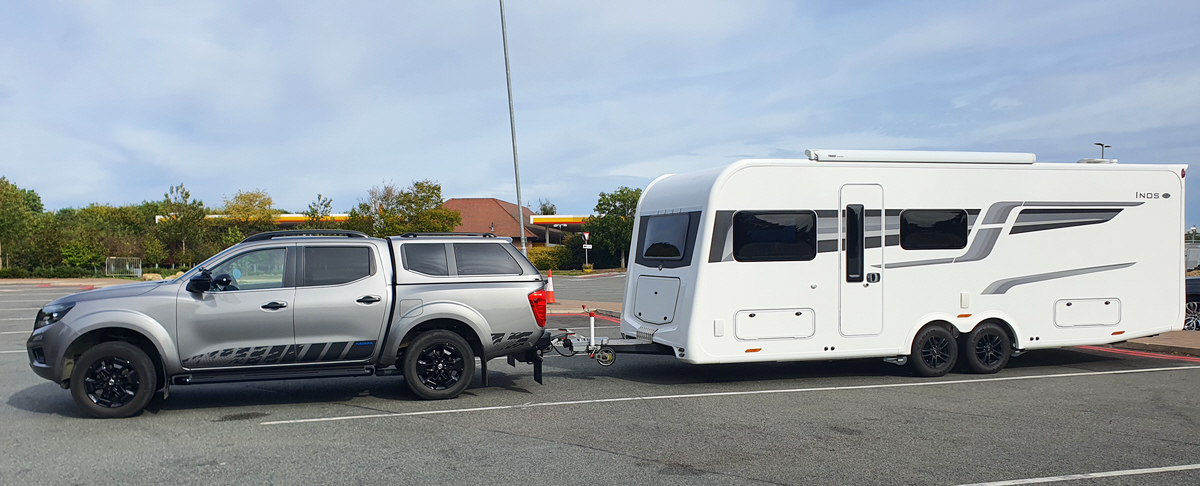
The big day finally arrives and this is our new "outfit" ready to tow our Inos home from Rhuallt where it was built - it is a VERY long combination and you will need to scroll across to see it all........

Since
we ordered our Inos in 2021 for delivery in February 2022 prices have
risen significantly.
Highly specified Inos caravans for delivery in 2025 are roughly hitting
the £100,000 mark according to the factory.
Video Reviews
Facebook Inos Caravan Owners group.
If you own an Inos or are thinking about owning one we have a Facebook group to share experiences and for mutualsupport.
You can apply to join here: https://www.facebook.com/groups/2110463659342981
Modifications and Additions.
As mentioned our plan was to modify our Inos from day one. In fact, some of the mods began at the factory as the design team were happy to accommodate our plans where they could. So, this included the type and positioning of both water inlets. The design of the prototype grey water tank system and extra cabling ready for my additions. Given the slideout, adding extra cabling post-build could prove a major challenge, so the team's willingness to fit this during build was appreciated.
So, in no particular order......
Exterior graphics additions.
We had the Inos delivered without the factory front graphics fitted because we just didn't like them. Very much a subjective personal choice.
My initial play with ideas can be seen here. I spent many an hour on my PC with different ideas and eventually designed somethng which we both loved and importantly our local graphics/Signage chap approved of and was happy to fit.
Anyway, the original is something like this:

And our inos now looks like this:
The front completely replaces the original graphics. The sides overlay part of the originals and extend them at the front corners to blend in to the new front design.

And the rear gets some more of the Carbon Fibre effect 10Yr film (the standard Inos has nothing here).
Note the solid stainless steel locked post (more below ground than above) set in concrete (and no, you can't simply go round it).

Actually
I didn't like the extra rear round reflectors I had added. This was an
own-goal on my part and so admitting I'd made
it look worse and not better
I looked
for alternatives. I was about to take them off and leave the rear panel
blank when I found
some old stock of "special" reflectors at a reasonable
price......

Awning light remote control.
Given
that the Inos has remote locking (like a motorhome), one
omission from the Inos standard spec which was a disappointment was
no keyfob control of the awning light - so useful when approaching
on dark nights.
It took about a day to rectify this which involved tapping into
the running
lights
that
the
remote
door
locking
flashes,
an isolation
relay and a timer module to give about 30 seconds of awning light when
locking/unlockinng.
Nothing to take a picture of really.
Accurate current meter/ammeter for EHU supply.
With all the mains equipment (A/C, Induction ring on hob are examples) I decided I needed an accurate ammeter to measure current consumption (pun intended). Digital ammeters are easily sourced, but accurate ones are more expensive and less common (errors of 30% are not unusual with some cheap meters - so rather useless). Luckily I had asked for an extra run of EHU cable to be routed up to the control panel during the Inos build (unconnected at each end for me to adapt). The result is very satisfying giving a certified accurate readout (caravan control panels with curent sensing built in are not always that accurate - accurate measurement costs money....).

There as also an Alde Load Monitor fitted which will cut out heating elements if required.
Electric awning remote control.
It
occurred to me that it would be really handy to have a remote control
for use when extending/retracting the awning. These are available on
some Thule awnings, but not the 6300. Remote control would allow
me to fiddle with the leg supports without having to go
back
in
and out
to
work the
switch. This was meant to be an easy one. All I needed was a two
channel remote relay to wire in parallel with the awning switch or so
I thought.
Not much to see, here is where the controls are.

However, I did add this.
The awning power supply is permanent, and adding
a radio frequency control posed the very small, but once thought
of unforgettable risk of some stray signal extending the awning while
travelling!
The
extra switch isolates all the awning controls as a precaution. As it happens
I also had to add a second changeover switch into the system.
Twin Aquaroll supply with Auto-changeover.
This had to be done before our first trip away as the inlets were fitted at the factory but without the control system, which is my own.
Basically as described elsewhere on this website, two Aquarolls are connected to the caravan. When one empties the system switches automatically to the other and you fill the empty one at your leisure with no interuption in water supply (other than a brief splutter if you are mid-shower).
Here are the connections:

And here is the display I made:
It shows which Aquaroll is selected and if it contains water.
Rear View Camera.
A wireles camera fitment is a factory option, but it's a bolt-on type and not aesthetically pleasing and the aerial is at the back of a very long caravan behind a very long pick up truck in our case.
I supplied an alternative camera with a separate wireless sender unit which they installed at the very front of the caravan for reliable connection. Works a treat.

Trim upgrades.
The interior window surrounds have no curtains and the walls have no trim of any kind, which for such an expensive caravan is a surprise.
The build photos at the top of this web page show the walls and window surrounds ex-factory.
However, this simply left me a blank canvas. Those who have seen the inside of our Inos just assume that's how they come from the factory - the team at the factory were careful to avoid making any comments they saw my work, but photos were definitely taken.
Please note - this trim upgrade is shown before I completely revamped the seating - see later.


Thule Panorama Room awning brackets.
The inner legs of the Thule awning are usually pegged to the ground to locate them. Being next to the caravan secure fixing is paramount and not always easy. Consequently I modified the legs and made brackets which fit to the side of the caravan. This means a secure and perfectly aligned fix every time.


Lounge TV mount and Sound upgrade.
An addition to the trim additions has been the 32" permanent TV mount and the Sound System upgrade - complete with subwoofer!
The angled space behind the TV is the perfect place to mount the subwoofer. On board sound quality is never brilliant (although the Inos does have its speakers in stoutly boxed in enclosures) and I used a simple (and inexpensive) way to achieve better results. The speakers are from a PC 2.1 system, but amplification/control is provided by a new 12V 2.1 amplifier. The result is exceptionally pleasing and discreet.
View of various upgrades in bedroom.
Some of these are mentioned elsewhere.

Bedroom TV install.
As a option a swivel TV mount is available in the bedroom. Given the vast amount of storage I decided to sacrifice a cupboard for a built in bedroom TV. I had the factory move the power and aerial sockets during manufacture. There is a small wired speaker behind the TV which improves the standard tinny sound.

Wastemaster "Nearly Full" warning.
Just as it says. A float switch is attached by a plug to a warning LED on the control panel.
Electric Towel Rail.
Light weight, much larger than the plumbed-in ones and can be used without having the heating on. The "faux leather" is attached to a piece of twinwall polycarbonate I had lying around. This means the original holes from the "far too small" towel radiator are hidden when I added my own sourced rail and we think it looks nice as well.

Shower extractor fan
There is a Thule Omnivent fan rooflight in the washroom, but experience has shown that an extractor in the shower cubicle does a much better job of drying out the enclosure - particularly useful if a shower is well used - which ours is. My design includes an efficient centrifugal blower and a proper back draught flap to preven cold air entering.
External aerial connection.
I had the team install extra Coax during construction. This meant adding a changeover switch and exterior connections was a quick job. We are still undecided about a satellite dish. These connections do mean an external dish can be instantly used. A roof mounted dish is also relatively easy should we go for one given the wiring inn the wardrobe.
Microwave oven ventilation.
In our Swift the microwave had a dedicated metal cowling to direct hot/damp air out from above the unit. In the Inos there is nothing to prevent the fan exhaust entering the adjacent high level locker. To stop this I built in a low power tangential fan which comes on automatically with the microwave. This successfully removes any hot/damp air from the area.
We also upgraded the microwave to the digital control model with a quartz grill function. The grill can generate quite a lot of extra heat and so I also added a thermostatically controlled tangential blower in the space above the microwave venting through a small mushroom vent on the roof. Unlike the other fan which comes on when the microwave is operating this extractor fan is independently temperature controlled.

Extra lighting.
Extra lighting was added in the lounge and bedroom to allow us to get the ambience we were after.
Exterior pump overrun control.
With the twin Aquaroll system we prefer to use these rather than the onboard tank/pump on most stays. The external pumps are triggered by a pressure switch like most modern systems. One thing we have found over the years is the pressure switches can be awkward to adjust to get just the right amount of overrun and avoid pulsing. By adding an adjustable "off-delay" timer relay we are able to make the pump action much more consistent.
A-Frame cover and surrounding trim.
One issue I had with the Inos build was the difficulty they had to get the centre lower front edge trim lined up and finished to my admittedly non-compromising standards. To get round the problem I made up a thick Aluminium plate which hides the area in question is also excellent to stand on.

Having added this, I also added some black trim either side.
Here is a picture the finished front of our caravan in the factory before I made the changes...

Front locker water deflector
Just a sheet of Butyl rubber clamped in place to prevent water pouring into the locker when opening in wet conditions. Simple, but effective.
Brake rod underbody support/mount.
The standard angle bracket caught on a bridge and ripped off. Using polypropylene I made a replacement with more give and yet stronger.

Entrance matting
This was the first Inos with a grey water tank. I insisted on an access hatch to allow for cleaning and we collaborated to make sure it was positioned where it could be covered by an extended fitted entrance mat I would fit. This allowed me to forgo the standard small thin mat for a proper thick commercial quality one which I trimmed to fit and hide the access hatch.

Washroom splashback

If
you look through the shower door you can see the upgraded grey panel.
I worked out a solution to a potential weak join (possible
leaks)
with the factory and this panel is part of the solution. You can
also see the uppgraded thermostatic shower control I had fitted during
the build.
Major seating upgrade.
We
didn't choose the £3000 (2021 price) factory leather upgrade and
I'm glad we didn't given what I have since done.
There's nothing wrong with the seating or the leather option, it's
just that the seating, although well made, is not very comfortable.
The Youtube video below goes into much greater detail, but basically the I completely revamped the seating to make it more comfortable AND more attractive.
Here are two photos to show the changes I have made....
Before:
After (the switch which operates the electric recline function can be seen on the arm rest):
Aerial upgrade.
The
factory supplied Teleco aerial functioned well enough, but the mast
was not really long enough to allow vertical polarisation
orientation
of the aerial without it fouling roof vents. It had also gone very
yellow very quickly.
I bought a long mast version of the Vision Plus aerial and made a support
bracket for it in the wardrobe. This now works really well.

Kitchen socket and Hob stand.
The
gas burners on the hob don't get much use, especially when on EHU. As
we do spend most stays with EHU we also
decided to source a compact Air
Fryer to use for many smaller cooking job normally done in the gas oven.
Ideally we would
need to free up space for the air fryer and provide
a suitable power outlet. My solution was to install an extra 13A socket
and
make a custom stand which sits on (and is held in place by) the tops
of the gas burners. The air fryer sits on here a treat and
the stand
is also useful for serving up if we don't want to use the lift-up flap
across the door.
The stand stows away with the coffee table top in the front overhead locker (yes
there is plenty of room) when
not
in
use.

The
air fryer sits neatly above the dressing table. I fitted a foam insert
in the cupboard which the fryer's feet fit into so
the unit stays put
even on bumpy roads. You can also see the Dyson cleaner and the Teltonica
Router for mobile WiFi.

Dressing table light.
The lighting above the dressing table was not ideal for make up (I was told), so I added some more suitable LED lighting.

Mobile WiFi Install.
Bought
a quality twin SIM Teltonica router and similar quality Poynting antenna.
There
are various packages available for leisure vehicles but after doing some
research I decided I could buy better for less.
Locating the router
above the dressing table was easy and originally I was going to position
the antenna just above this.
Doing
more research I discovered that all these antennas function better if
placed on a metal surface (screening?) so I decided
to mount the antenna
on a commercial aluminium tray!

I
actually sandwiched the tray between the antenna and a shallow ABS waterproof
project box. This also meant that the
antenna mounting was no longer
through the roof and so mounting location could be moved to suit.

Lithium Battery Upgrade.
The
standard 90AH lead/acid battery had been fine (mainly becuase we always
try and stay on sites with EHU) but even
at less than 3 years old was
showing the first signs of struggling when worked hard getting our caravan
on and off our drive
(goes in nose first, so all done with the motor
movers). Sudden failure could leave us in a very awkward predicament,
so a
replacement/upgrade seemed sensible.
LiFePO4
prices were finally getting less crazy and when a company like Fogstar
offer a 10 year warranty, whole life costs
suddenly become almost reasonable.
A Fogstar Drift 280AH battery fits very nicely in
the battery box. The Fogstar Drift range
are a good quality item with
built in everything, including Bluetooth monitoring and control along
with built in heaters to
prevent low temp charging damage.

The
black panel to the left in the photo above is a result of me altering
the existing recessed panel removable from the outside.
This was to
allow better access for cabling and fitting a LiFePO4 charger.
Apuljack
Electronics offer a drop in charger for Lithium batteries, but I decided
to take the much more complex route of upgrading
the cooling of the
standard BCA PSU to increase its service life and resilience (they
are known to fail due to overheating).

What
you can't see in the above picture is the 120mm silent cooling fan ducted
out the back and the additional 80mm
silent
fan to the side.
I
then added a dedicated LiFePO4 charger from Fogstar to ensure
100% compatibility with the Fogstar
battery.
To get this to work requires additional circuitry as
simply bypassing the BCA battery charging section means no 12V supply
off
EHU.
To complete the install the solar charge controller was upgraded to MPPT.

Motormover Power Switch Upgrade.
When
I changed the battery I also fitted a new main power switch for the motormovers
as on the original the terminal posts
didn't feel that solid
even with the bolts tight. At this stage I replaced the switch with the
same type.
However,
since then I have had occasional issues with one set of movers stalling,
which a power off/on would fix. With only
one set stalling this does
not point to the main switch, but as I had tried everything else and
traced the rest of the cable runs and
Truma (who own Powrtouch) suggested
I try this before calling out an
engineer I thought I'd fit another new one - but this time I
would make
sure it was a quality item.
The good news is that so far the movers have been working just fine since this upgrade.
I
should point out that the all of our previous caravans with motor movers
fitted had isolator switches similar to the obviously
cheaper version shown below.
In the photo below it is very obvious which one is the better switch, which I have now fitted:


Front end "Inos" trim.
The
carbon fibre style wrap has helped define the front end beyond the standard
finish for the year (2022), but it still looked
slightly unfinished to
me. Consequently I did a bit of experimenting and the end result is in
the photo. Definitely enough "detail"
in the UPVC trim and I N O S lettering, as any more would be too much
I think....
